
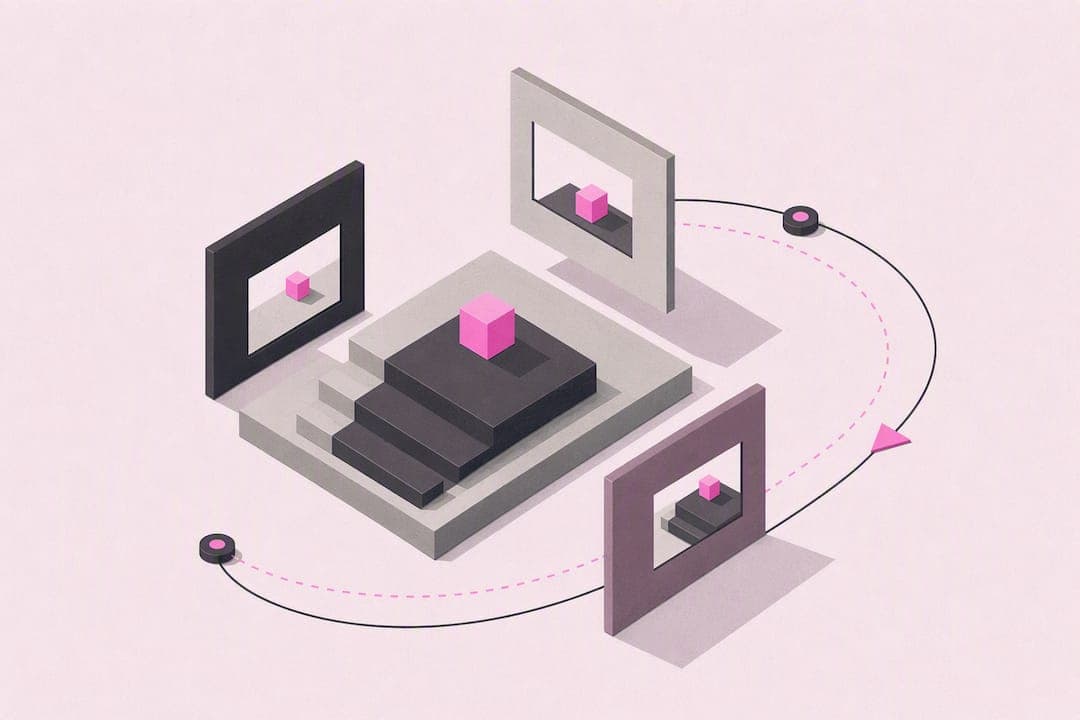
AI camera moves turn a still photo or short clip into a cinematic micro-shot by simulating dolly, pan, orbit, and other real camera trajectories through text prompts or presets. The immediate payoff is speed: a still becomes a push-in or an orbit shot in minutes, usable for previz, product reveals, or short-form social clips. Composition rules like the rule-of-thirds still govern the frame, and platforms offering AI content tools apply that same logic to keep character shots consistent across renders.
TL;DR:
- Using specific camera move names in prompts improves accuracy, with subtle moves like handheld drift being more reliable than aggressive ones such as whip pans.
- Prompts should follow a five-part structure starting with movement, then direction and speed, framing, lens feel, and duration for best results.
- Image-to-video tools are ideal for creating cinematic motion from still images, while video-to-video and PTZ systems suit different project needs.
- Model limitations include potential geometry distortions during fast or complex moves and difficulty maintaining multi-shot continuity without depth data or keyframe locking.
- AI camera moves serve as helpful assistants, but creators must still judge when to keep scenes still or move intentionally to support storytelling.
Table of Contents
- What Counts as an AI Camera Move?
- Prompt Recipes for Each Major Move
- How Should You Structure an AI Camera Prompt?
- Which Tool Type Fits Your Project?
- What Research Says About How These Models Actually Work
- Three Copyable Workflows Worth Trying
- The Trade-Off Nobody Talks About With AI Camera Motion
- Try AI Clips With Consistent Characters on Onlynudes
- Sources
- FAQ
What Counts as an AI Camera Move?
Filmmakers have a shared vocabulary for camera motion, and AI tools work best when you borrow it directly instead of describing motion in vague terms. Naming the move gets you closer to the intended result on the first try, because most models were trained on footage labeled or tagged with these exact terms.
Here's the working list worth memorizing:
- Push-in / dolly in — camera moves toward the subject; builds tension or intimacy. Works well in both image-to-video and video-to-video.
- Pull-back / dolly out — camera moves away, revealing context or environment. Strong for reveal shots.
- Pan — camera pivots horizontally on a fixed axis. Subtle for scanning a scene, aggressive as a whip pan.
- Tilt — camera pivots vertically. Good for revealing height or scale, from feet to face.
- Orbit — camera circles the subject while it stays centered. High visual impact, best for product or character reveals.
- Crane / jib — vertical rise or descent combined with reframing. Reads as high production value.
- Tracking / truck — camera moves laterally alongside a moving subject. Needs video-to-video input for realistic parallax.
- Zoom (optical feel) — framing tightens or widens without physical camera movement. Cheaper to render than a true dolly.
- Whip pan / whip transition — extremely fast pan that blurs the frame, often used as a scene transition.
- Handheld drift — small, organic camera wobble. Adds realism, works against sterile AI polish.
- Dolly zoom (vertigo effect) — push in while zooming out (or vice versa), warping background perspective. Hard to pull off but distinctive when it lands.
- Static lock-off with subject motion — camera holds position while the subject moves. Often the most stable and predictable output.
Subtle moves (handheld drift, slow push-in, gentle pan) tend to render more reliably than aggressive ones (whip pan, dolly zoom, fast orbit), which stress-test a model's grasp of geometry and consistency. If you're new to a tool, start subtle and work up.
Prompt Recipes for Each Major Move
A usable prompt for image-to-video camera motion tools generally needs five pieces: the move name, direction, speed, framing, and duration. Skip one and the model guesses, usually badly.
Here are recipes you can copy and adapt:
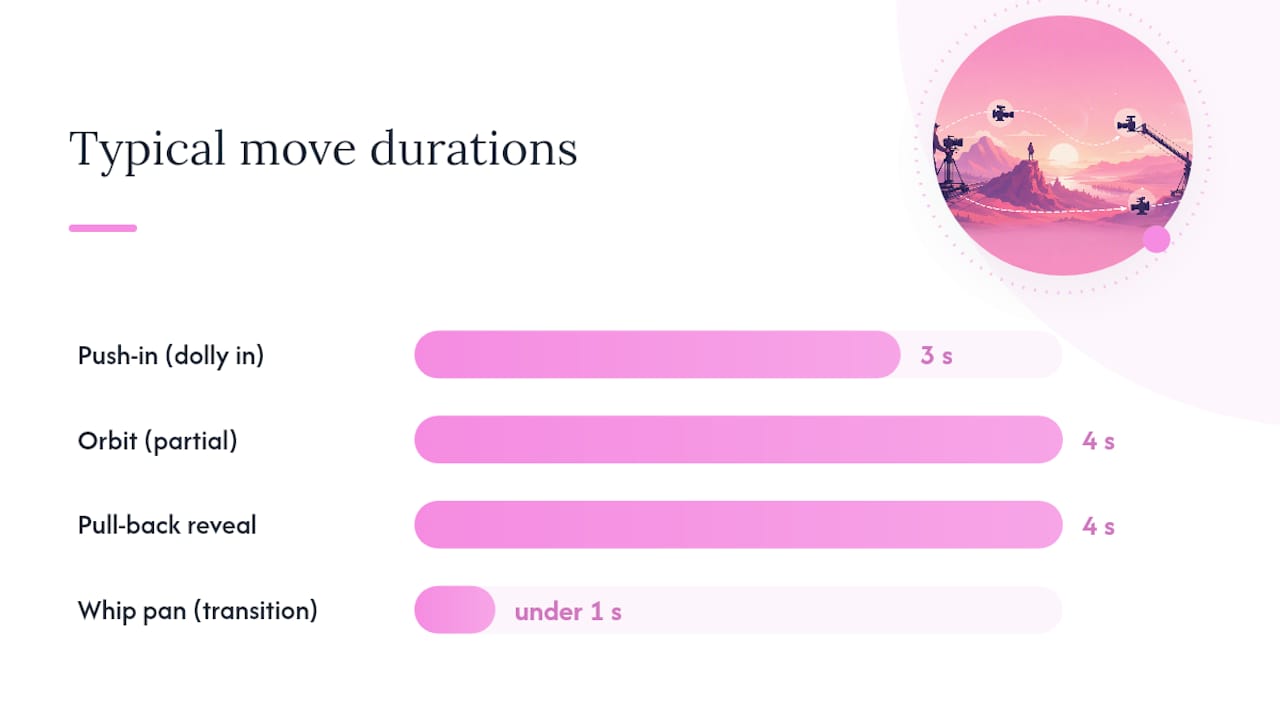
- Push-in (dolly in): "Slow push-in toward subject's face, medium speed, tight close-up by end frame, 3 seconds, cinematic 35mm lens feel." Tuning tips: keep the starting distance moderate (extreme close-ups exaggerate warping), specify "medium speed" over "fast" for stability, and add "shallow depth of field" if you want background blur to sell the depth change.
- Orbit: "Camera orbits subject 90 degrees left to right, steady speed, subject remains centered, 4 seconds, soft studio lighting." Tuning tips: full 360-degree orbits fail more often than partial ones; cap your ask at 90 to 180 degrees for a cleaner render.
- Pull-back reveal: "Camera pulls back from close-up to wide shot, revealing full environment, moderate speed, 4 seconds." Tuning tips: describe what should appear in the widened frame, not just "reveal the room," since vague endpoints produce vague backgrounds.
- Whip pan transition: "Fast whip pan left to right, motion blur, quick cut feel, under 1 second." This is the most failure-prone move on the list. If the output smears the subject beyond recognition, cut speed by half and re-render rather than accepting the first pass.
- Handheld drift: "Subtle handheld camera drift, natural shake, static framing otherwise, 5 seconds, documentary feel." Works as a low-risk finishing touch on nearly any base shot.
Three failure modes show up constantly. Drifting composition, where the subject slides out of frame midway through the clip, usually means you didn't lock subject distance in the prompt. Warped geometry on faces or hands during orbit and dolly zoom shots often means the move is too fast for the model's stability. And flat, lifeless motion, where nothing seems to move despite a clear instruction, usually traces back to a missing speed modifier.
Pro Tip: For orbit shots specifically, keep the subject on a rule-of-thirds intersection point throughout the described motion rather than dead center. It reads as more intentional and less like a generic 360-degree product spin.
How Should You Structure an AI Camera Prompt?
The five-part order matters more than most people assume: movement, then direction and speed, then framing, then lens feel, then duration and style. Models parse prompts roughly left to right, weighting earlier terms more heavily, so lead with the move itself.
A working template looks like this:
- Movement: name the move (push-in, orbit, crane up, etc.)
- Direction and speed: left to right, slow, fast, moderate
- Framing: close-up, medium shot, wide, rule-of-thirds placement
- Lens feel: 35mm, shallow depth of field, wide-angle distortion
- Duration and style: 3 to 5 seconds, cinematic, documentary, commercial
Once you have a base render, don't accept the first output as final. Preview it, then tighten framing if the subject drifts, lock the subject-to-camera distance explicitly in your next prompt revision, and resample. This loop, described in Melies's image-to-video workflow guidance, of upload, describe, preview, and iterate consistently beats trying to write the perfect prompt on the first attempt.
Composition rules belong in the prompt itself, not just in your head. Writing "subject on left third, headroom above, lead room in direction of camera travel" gives the model concrete spatial anchors, and anchored compositions hold together better through motion than centered, headroom-free framing does.
Which Tool Type Fits Your Project?
Three distinct tool classes handle AI camera moves, and picking the wrong one wastes credits and time.
Image-to-video generators take a single still and simulate motion around it, useful for product shots, portrait reveals, and previz from a storyboard frame. Video-to-video tools take existing footage and reinterpret or stabilize its camera motion, better suited for stylizing real production footage. Robotic and PTZ systems, like Canon's Auto Tracking and Auto Loop apps, pre-program physical camera movement for live production rather than generating pixels, and they augment camera operators rather than replace them.
- Choose image-to-video when you're starting from a single photo or design mockup.
- Choose video-to-video when you already have footage and need cleaner or stylized motion.
- Choose robotic PTZ when the shoot is live and repeatable framing matters more than novelty.
Pricing across generative tools mostly runs on pay-per-render or credit-pack models, and cost scales with resolution and clip duration rather than a flat per-video rate. A 4-second preview at lower resolution costs less than a final 10-second render at full quality, so most workflows treat early passes as cheap drafts and save the expensive render for the shot that already works.
What Research Says About How These Models Actually Work
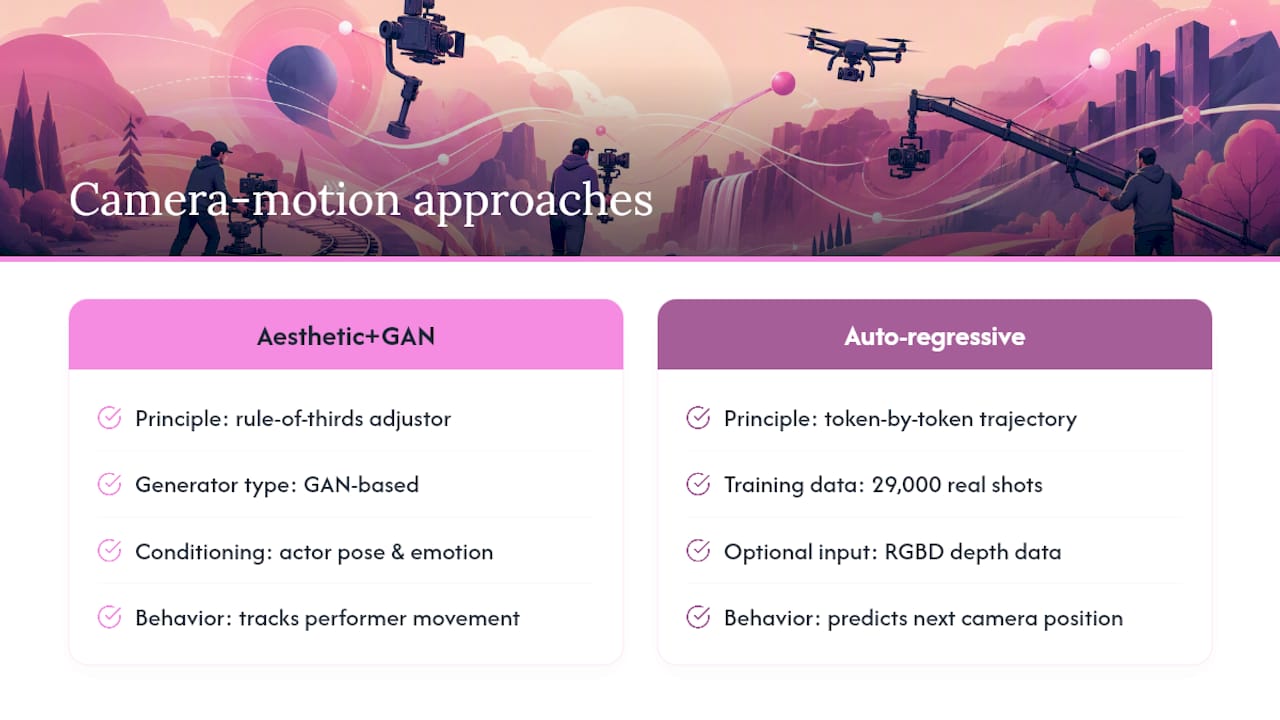
Camera motion generation isn't guesswork under the hood. One research framework builds an aesthetic adjustor around rule-of-thirds placement, then pairs it with a GAN-based generator that synchronizes camera trajectories to actor pose and emotion, producing motion that tracks a performer's movement rather than sliding independently across the frame.
A separate line of work, DataDoP and GenDoP, takes a different approach: an auto-regressive model trained on 29,000 real camera shots predicts each next camera position as a token conditioned on prior positions, and optionally on RGBD depth data. That token-by-token method reduces the jittery discontinuities common in earlier diffusion-based trajectory generators.
The practical limit shows up in multi-shot continuity and full six-degrees-of-freedom motion, where models can hallucinate geometry that doesn't hold together across a cut. RGBD inputs and manually locked keyframes are the current workaround, giving the model real depth data or fixed anchor points instead of asking it to infer geometry from a flat image alone.
For most creative work, this means: trust auto-regressive, trajectory-conditioned tools for smoother single-shot motion, but don't expect flawless continuity across multiple linked shots yet.
Three Copyable Workflows Worth Trying
- Social product tease: Upload a clean product photo, prompt a 90-degree orbit with soft studio lighting, render at preview resolution first, then re-render at full resolution once framing holds. Roughly one to two credits and under five minutes total.
- Previz from a storyboard frame: Take a rough storyboard panel, prompt a push-in or crane move matching the intended final shot, and use the output to pitch pacing to a director or client before committing to a full production day.
- Portrait clip with face continuity: Store a reference face in a character profile, prompt a subtle handheld drift or slow push-in, and reuse that same profile across every future render so the same face holds steady across a whole content series.
The Trade-Off Nobody Talks About With AI Camera Motion
AI camera moves are an assistive tool, not a director. The model can execute an orbit or a push-in convincingly, but it has no opinion on when a scene needs stillness instead of motion, and that judgment call still belongs to you. The creators getting the best results treat prompts as instructions to a camera operator, not as a substitute for their own editorial eye on timing and framing.
The bigger risk isn't bad geometry. It's leaning on motion as a gimmick to disguise a shot with weak composition or no story reason to move at all. And for anyone generating AI content for subscription platforms, staying inside platform rules on AI-generated media matters just as much as getting the orbit shot right.
— Max
Try AI Clips With Consistent Characters on Onlynudes
Onlynudes gives you a faster path from a single photo to a finished clip than shooting a scene from scratch. You upload a reference image, generate a short cinematic clip using the same push-in, orbit, and drift language covered above, and reuse a stored character profile so the same face and features hold steady across every future render.
Creators building content for subscription platforms can benefit from features like speed — clips rendering faster than traditional shoots — and continuity via character profiles that keep consistent faces across content series. Pricing often runs on prepaid credit packs, so payment is per render without subscription commitments.
Start with the AI clips from a photo tool to generate your first camera-move clip, or set up a character profile first if consistency across a series matters more than a single shot.
Sources
- DataDoP / GenDoP: auto-regressive camera trajectory generation
- Canon launches Auto Tracking and Auto Loop apps for PTZ camera
- AI Camera Movement Generator for Image-to-Video • Melies
FAQ
Is there a free AI camera movement effect available?
Some image-to-video tools offer limited free previews or trial credits, but full-resolution renders with named camera moves typically run on a pay-per-render or credit model, including on Onlynudes.
How is AI used in cameras?
AI drives two separate things: generative tools that simulate camera motion from a still or clip using trained trajectory models, and physical automation like PTZ robotics that pre-program real camera pan, tilt, and zoom for live production.
Can you give me some examples of camera movement?
Push-in, pull-back, pan, tilt, orbit, crane, tracking, whip pan, handheld drift, and dolly zoom are the core moves filmmakers name directly in prompts to get predictable, recognizable results.
Is AI motion free?
Rarely fully free for production-quality output. Most tools price by resolution and clip duration through credit packs, so a quick low-resolution preview costs less than a final high-resolution render.